Cómo levantarte en foil: técnica paso a paso para principiantes
Por el equipo de Escuela de Wingfoil · Octubre 2026
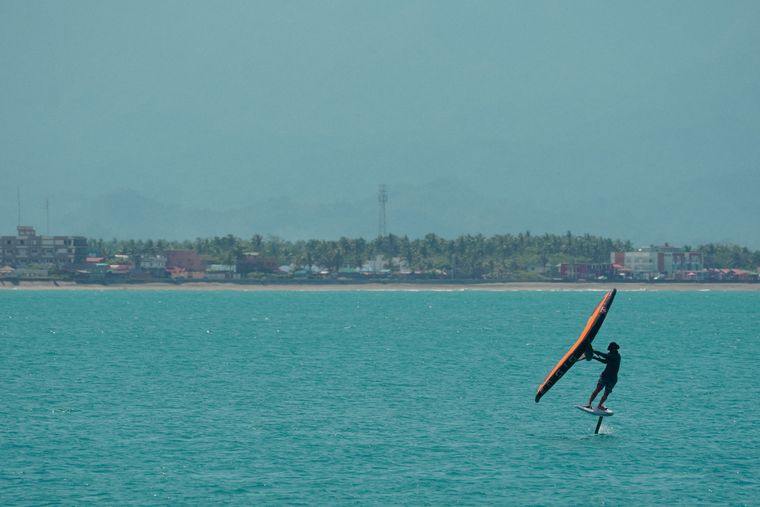
El primer vuelo es el momento que todos esperan: la tabla se despega del agua, el ruido desaparece y de golpe estás volando. No es magia ni fuerza: es una secuencia de pasos bastante concreta. Acá va, de la tabla apoyada hasta el vuelo estable, con los errores que te van a tirar en cada etapa.
Antes de intentarlo, tenés que poder…
- Pasar de rodillas a parado en la tabla sin caerte.
- Navegar con la tabla apoyada (taxi) en las dos direcciones.
- Volver al punto de partida sin terminar lejos a favor del viento.
Si todavía no, empezá por los ejercicios en tierra.
Paso 1: la posición de base
- Pie de adelante sobre el mástil o apenas delante, apuntando hacia la nariz de la tabla en unos 45°.
- Pie de atrás un poco más atrás del mástil, cruzado a la tabla.
- Rodillas flexionadas, cadera alineada con los pies, espalda derecha.
- Mirada al horizonte, nunca a la tabla.
Muchas tablas traen marcas o se puede ubicar el mástil mirando la tabla de costado en la playa. Anotá dónde va cada pie antes de entrar.
Paso 2: ganar velocidad en el rumbo correcto
El foil necesita velocidad para levantar. La vas a conseguir navegando un poco abierto del viento: ni de frente ni de espaldas, en un rumbo de través o apenas hacia abajo del viento. Ahí el ala tira más y la tabla acelera.
Cerrá el ala con la mano de atrás para cargarla y, si el viento es justo, hacé dos o tres bombeos cortos (pumping) con el ala.
Paso 3: cargar el pie de atrás… un instante
Cuando sientas que la tabla va rápido y "flota" más liviana, cargá suavemente el pie de atrás. La nariz sube un poco y el foil empieza a generar sustentación. Es un gesto corto: dura un segundo, no más.
Paso 4: pasar el peso adelante apenas despega
Este es el paso que decide todo. En cuanto la tabla se separa del agua, llevá el peso al pie de adelante para frenar la subida. Si no lo hacés, el foil sigue subiendo, sale del agua y te caés (el famoso breach).
La idea es que la tabla quede paralela al agua, a unos 20 o 30 cm de altura. Pensá "tabla plana", no "más alto".
Paso 5: estabilizar el vuelo
- Controlá la altura con pequeños ajustes de peso entre los dos pies: adelante baja, atrás sube.
- Mantené el ala estable y un poco abierta: cuando ya volás, necesitás mucho menos empuje.
- Seguí mirando lejos. Si mirás la tabla, se te va la altura.
Paso 6: aterrizar a propósito
Antes de que te canses, practicá bajar a propósito: cargá el pie de adelante de a poco hasta que la tabla toque el agua y siga navegando. Aterrizar controlado te da confianza para volver a despegar.
Los tres fallos más comunes y qué significan
| Lo que pasa | Por qué | Qué hacer |
|---|---|---|
| La tabla sube de golpe y el foil sale del agua | Mucho peso atrás o demasiada velocidad | Pasar peso adelante apenas despega. Abrir un poco el ala. |
| La nariz se clava en el agua | Peso muy adelante o bajaste de golpe | Correcciones más chicas, rodillas flexionadas. |
| No despega nunca | Poca velocidad o rumbo muy cerrado al viento | Abrir el rumbo, bombear el ala, usar un ala más grande. |
El equipo también ayuda
Un ala delantera de foil grande (1.800 a 2.500 cm²) y un mástil corto (60 a 75 cm) hacen que el despegue sea más lento y controlable. Si estás peleando mucho, puede ser el equipo y no vos: mirá cómo elegir tu primer foil.
¿Querés que alguien te diga en qué paso estás fallando? Un instructor lo detecta en una pasada. Y repasá los 10 errores más comunes.
Your first flight is the moment everyone waits for: the board lifts off the water, the noise disappears and suddenly you're flying. It's not magic or strength: it's a pretty specific sequence of steps. Here it is, from board on the water to stable flight, with the mistakes that will knock you off at each stage.
Before you try, you need to be able to…
- Go from kneeling to standing on the board without falling.
- Ride with the board on the water (taxiing) in both directions.
- Get back to your starting point without ending up far downwind.
If not yet, start with the land drills.
Step 1: the base stance
- Front foot over the mast or just in front, pointing towards the nose at about 45°.
- Back foot a bit behind the mast, across the board.
- Knees bent, hips over your feet, back straight.
- Eyes on the horizon, never on the board.
Many boards have markings, or you can locate the mast by looking at the board from the side on the beach. Note where each foot goes before going in.
Step 2: build speed on the right heading
The foil needs speed to lift. You'll get it by riding slightly off the wind: neither upwind nor straight downwind, on a beam reach or slightly downwind. That's where the wing pulls hardest and the board accelerates.
Sheet in with your back hand to power the wing and, if the wind is marginal, make two or three short pumps with the wing.
Step 3: weight the back foot… for a moment
When you feel the board going fast and "floating" lighter, gently weight your back foot. The nose rises a little and the foil starts generating lift. It's a short move: one second, no more.
Step 4: shift weight forward as soon as it lifts
This step decides everything. As soon as the board leaves the water, move your weight onto your front foot to stop the climb. If you don't, the foil keeps rising, breaches and you fall.
The idea is for the board to stay parallel to the water, about 20 to 30 cm up. Think "flat board", not "higher".
Step 5: stabilise the flight
- Control ride height with small weight shifts between your feet: forward goes down, back goes up.
- Keep the wing steady and slightly open: once you're flying, you need much less power.
- Keep looking far ahead. If you look at the board, you lose your height.
Step 6: touch down on purpose
Before you get tired, practise coming down deliberately: weight your front foot gradually until the board touches the water and keeps riding. A controlled touchdown gives you the confidence to take off again.
The three most common failures and what they mean
| What happens | Why | What to do |
|---|---|---|
| The board shoots up and the foil breaches | Too much weight back or too much speed | Shift weight forward as soon as it lifts. Open the wing a little. |
| The nose digs into the water | Weight too far forward or you dropped abruptly | Smaller corrections, knees bent. |
| It never lifts | Not enough speed or heading too close to the wind | Bear away, pump the wing, use a bigger wing. |
Gear helps too
A big front foil wing (1,800 to 2,500 cm²) and a short mast (60 to 75 cm) make take-off slower and more controllable. If you're struggling a lot, it may be the gear, not you: see how to choose your first foil.
Want someone to tell you which step you're failing? An instructor spots it in one pass. And go over the 10 most common mistakes.


